Descope
This page documents how to configure a Descope Application for use with Pomerium. It assumes you have already installed Pomerium.
While we do our best to keep our documentation up to date, changes to third-party systems are outside our control. Refer to OIDC Applications in Descope from Descope's docs as needed, or let us know if we need to re-visit this page.
Create a Descope OIDC Application
-
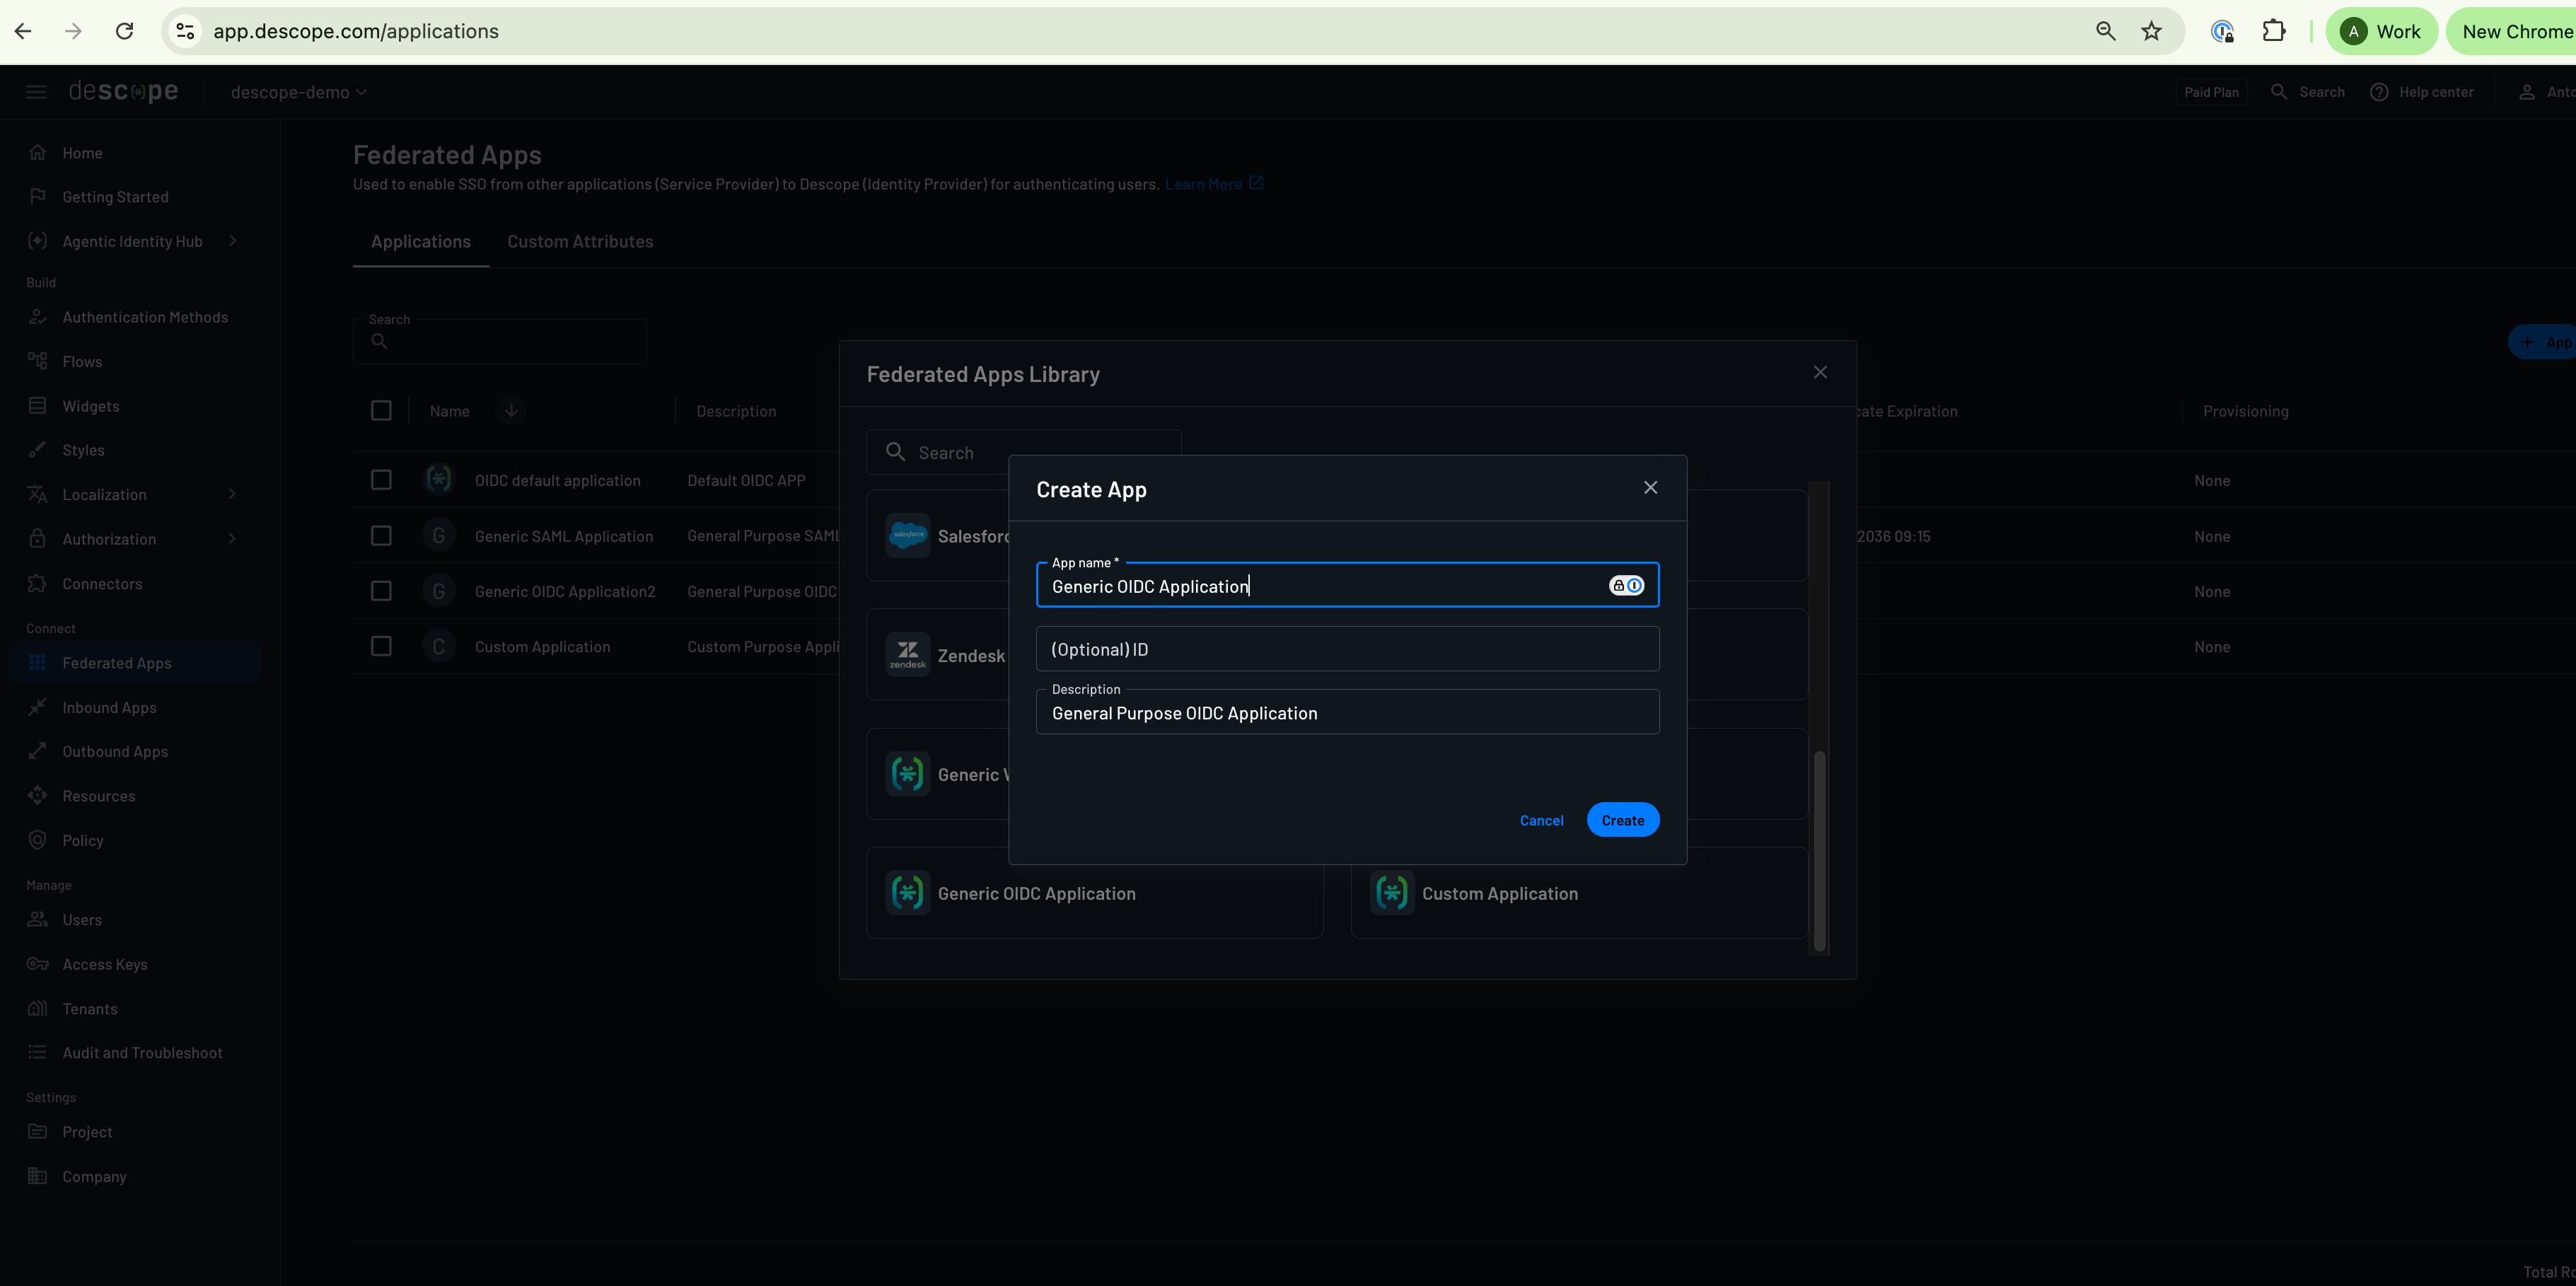
Log in to your Descope console and select Federated Apps in the left sidebar. On the Applications page, you can use the default OIDC application configured out of the box, or click the + Application button to create a new application. From the Federated Apps Library, select Generic OIDC Application. Provide an App name and optionally an ID and Description, and then click Create.
-
Under the IdP Configuration tab, note the Issuer URL value, which will later become the Identity Provider URL when configuring Pomerium.
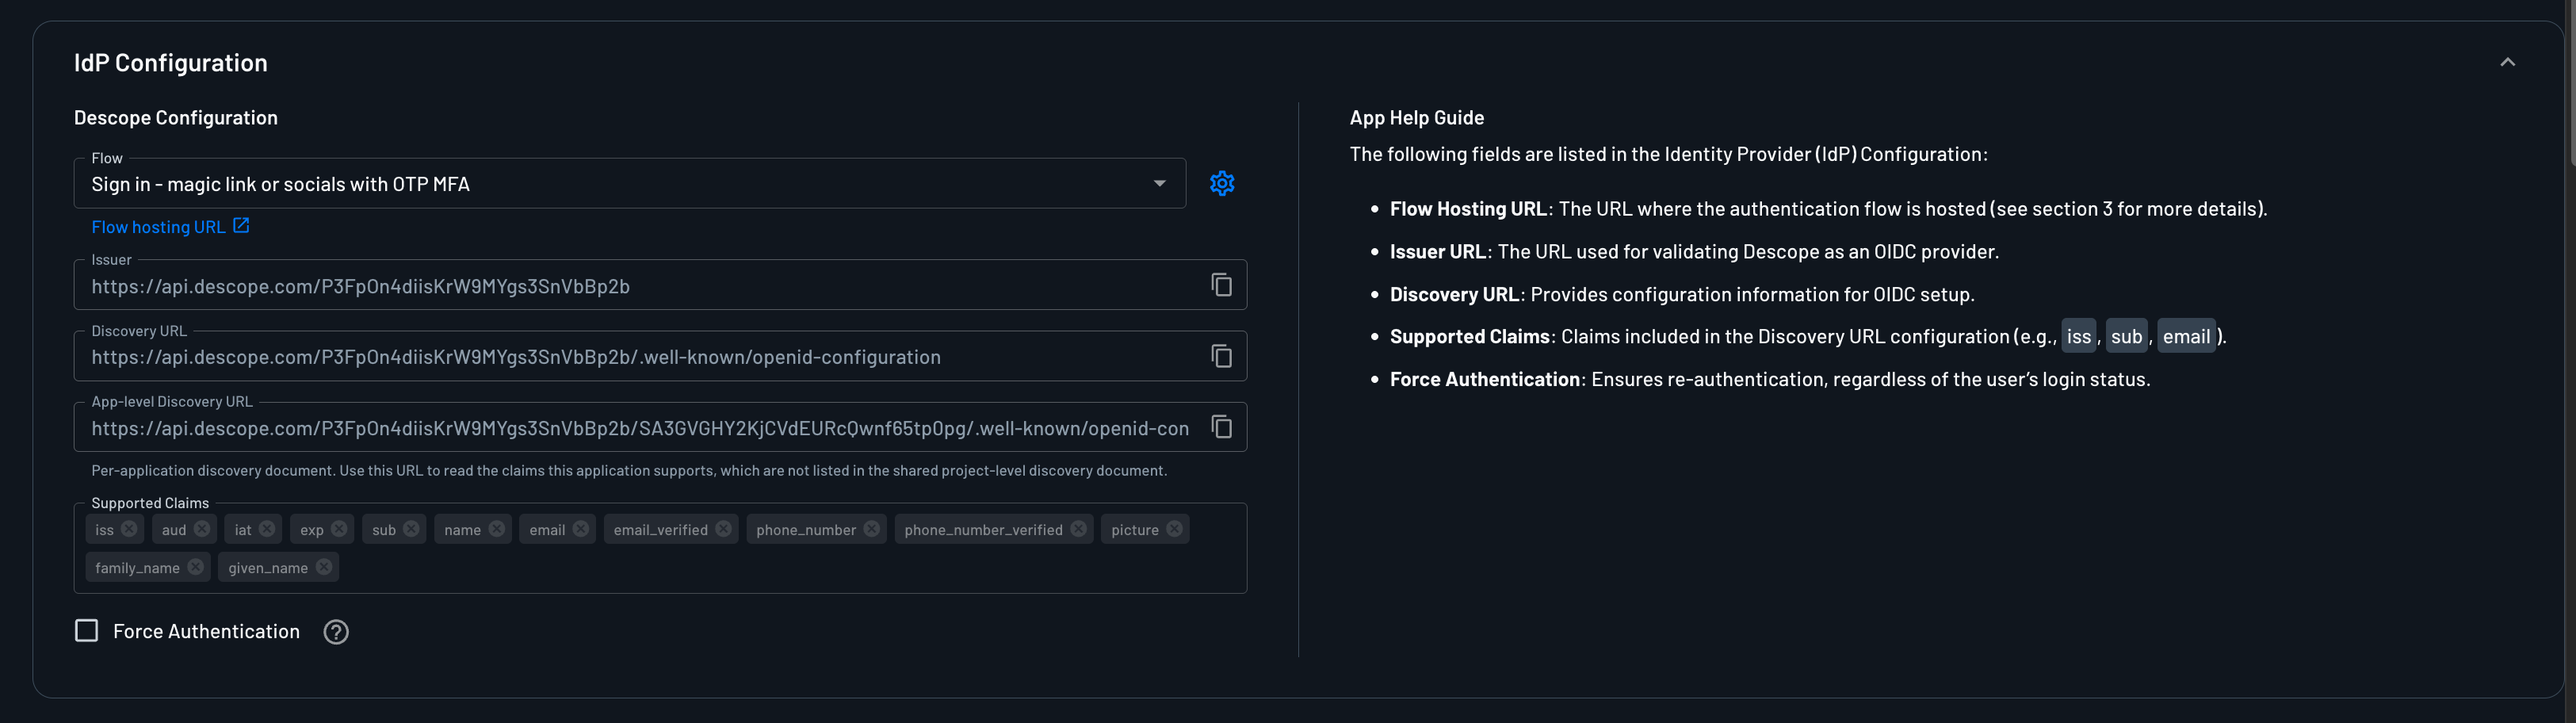
Here you can also customize the exact Flow which users will use to authenticate.
-
Under the SP Configuration menu, select Confidential under Client Authentication. Note the Client ID and Client Secret to apply in Pomerium's settings.
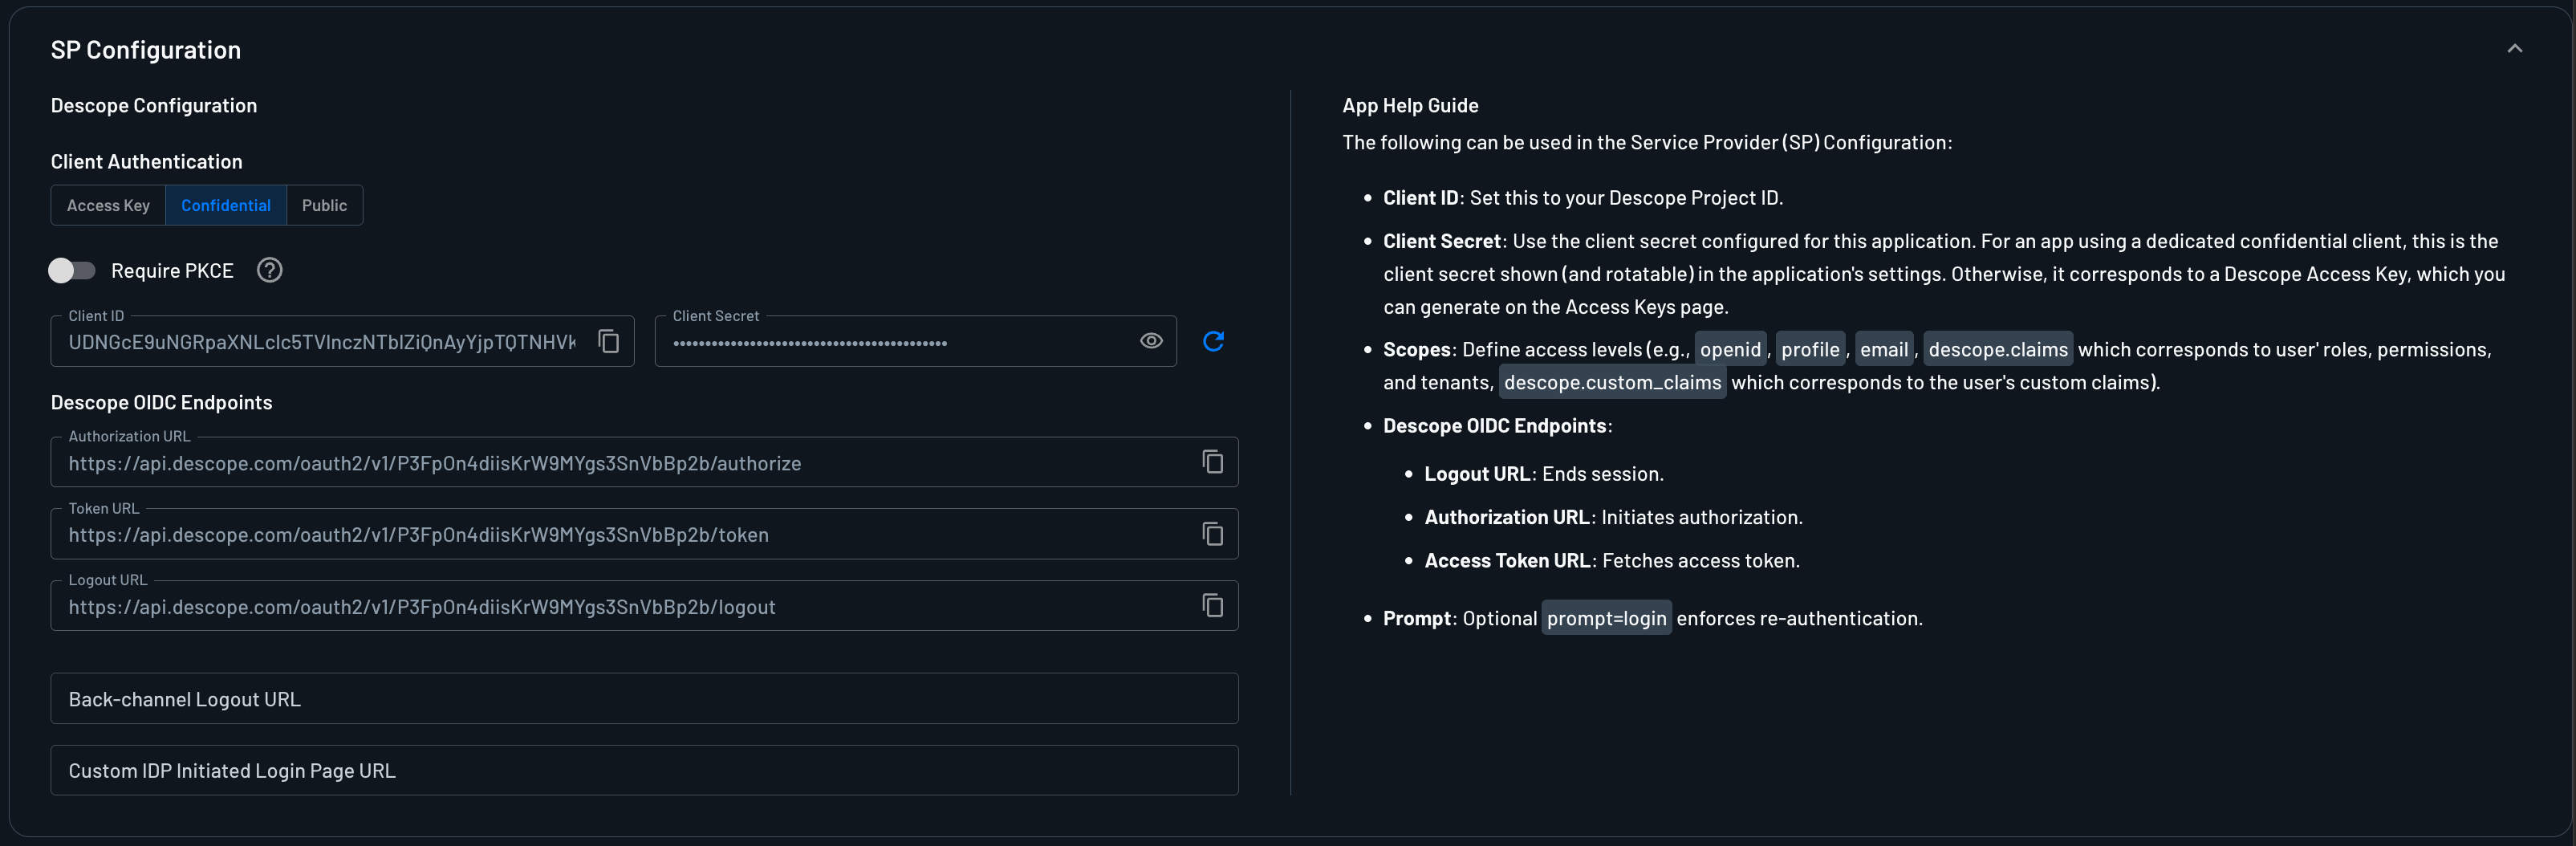
Save your changes.
-
Descope restricts Federated App callback URLs to the domains listed under Approved Domains, configured at Project Settings → General Settings → Security → Approved Domains in the Descope console.
Add the domain from your Pomerium
authenticate_service_url. For example, if the URL is https://auth.example.com, add:auth.example.comEnter only the domain, without
https://or a URL path. Save your changes.cautionIf the Approved Domains list is empty, Descope skips domain validation, so this step is optional. If you add any domains to the list, make sure to also include
api.descope.com, since Descope’s hosted domains aren’t added automatically.
Configure Pomerium
You can now configure Pomerium with the identity provider settings. Your config.yaml keys or environmental variables should look something like this.
- Config file keys
- Environment Variables
idp_provider: 'oidc'
idp_provider_url: 'https://api.descope.com/<Project ID>'
idp_client_id: 'REPLACE_ME' # from the Descope OIDC application
idp_client_secret: 'REPLACE_ME' # from the Descope OIDC application
idp_scopes: 'openid,profile,email,offline_access,descope.claims,descope.custom_claims'
IDP_PROVIDER="oidc"
IDP_PROVIDER_URL="https://api.descope.com/<Project ID>"
IDP_CLIENT_ID="REPLACE_ME" # from the Descope OIDC application
IDP_CLIENT_SECRET="REPLACE_ME" # from the Descope OIDC application
IDP_SCOPES="openid,profile,email,offline_access,descope.claims,descope.custom_claims"
Role-Based Access Control and Custom Claims
To authorize users' access based on roles and permissions managed in Descope, append the descope.claims scope to the default scopes in your Pomerium configuration.
idp_scopes: 'openid,profile,email,offline_access,descope.claims'
The descope.claims scope adds the user’s Descope roles, permissions, and tenant authorization information to the ID token.
Use Pomerium’s claim policy criterion to check these claims. For example, this policy allows access only to users with the admin role:
routes:
  - from: 'https://verify.localhost.pomerium.io'
    to: 'https://verify.pomerium.com'
    policy:
      - allow:
          and:
            - claim/roles: admin
You can also authorize based on Descope permissions:
policy:
  - allow:
      and:
        - claim/permissions: Impersonate
Custom Claims
To include custom claims in the ID token, configure them in Descope and add the descope.custom_claims scope in Pomerium.
idp_scopes: 'openid,profile,email,offline_access,descope.claims,descope.custom_claims'
For example, if the issued token contains a custom department claim:
{
  "department": "engineering"
}
You can then reference it directly in a Pomerium policy:
policy:
  - allow:
      and:
        - claim/department: engineering