Develop an MCP App
Build interactive apps using the MCP Apps extension — the open standard for rendering interactive UI components inside MCP hosts. The Pomerium template uses the official @modelcontextprotocol/ext-apps SDK and works with any MCP Apps spec-compliant host, including ChatGPT, Claude, VS Code, and Goose.
Your MCP server handles tool execution and returns structured data that the host renders as interactive UI components in a sandboxed iframe.
What you get:
- An MCP server that registers tools and returns widget-ready structured data
- React-based widgets rendered inside your MCP host as interactive iframes
- UI capability negotiation — the server detects host capabilities and falls back to text-only for non-UI clients
- Secure authentication via Pomerium — use
pom.runfor local development or deploy permanently
Architecture
The template builds and serves two separate properties:
| Property | Dev | Production | Access policy |
|---|---|---|---|
MCP server (/mcp) | Public URL via pom.run tunnel | Public URL via Pomerium | Auth-gated — tool calls always require a Bearer token |
| Widget assets | localhost:4444 (rendered in your browser) | Public URL via Pomerium | Public — the MCP host renders widgets in a sandboxed iframe and cannot forward credentials |
The MCP server always needs a publicly reachable URL so the MCP host can reach it. Widget assets only need a public URL in production; during development your local browser loads them directly from localhost.
Tool calls always carry a Bearer token and should be gated by a strict Pomerium policy. Widgets must be publicly accessible because the MCP host renders them in a sandboxed iframe and cannot forward authentication tokens.
How it works
Your MCP server registers tools using registerAppTool from @modelcontextprotocol/ext-apps/server. Each tool response includes:
- Text content — human-readable text for the MCP host's conversation
- Structured JSON data — passed to the widget via the
App.ontoolresultcallback - Widget metadata — a
_meta.ui.resourceUripointing to a widget resource (e.g.,ui://echo)
The host renders your widget in an iframe. The widget uses the App class from @modelcontextprotocol/ext-apps to receive tool output and call back into the MCP server via app.callServerTool().
Prerequisites
- Node.js 22+ — verify with
node -v - npm 10+ — ships with Node 22, verify with
npm -v - An MCP Apps-compatible host (e.g., ChatGPT, Claude, VS Code, Goose)
Step-by-step
1. Scaffold from the template
git clone https://github.com/pomerium/chatgpt-app-typescript-template my-mcp-app
cd my-mcp-app
npm install
npm run dev
This starts both the MCP server (http://localhost:8080) and widget dev server (http://localhost:4444).
2. Expose your MCP server with pom.run
The MCP host needs a public URL to reach your server — localhost won't work. In a new terminal (keep npm run dev running):
ssh -R 0 pom.run
Sign in and you'll get a public route URL like https://mcp.your-route-1234.pomerium.app that tunnels to your local MCP server. The widget dev server (localhost:4444) stays local — your browser loads it directly. For full tunneling details, see Tunnel to ChatGPT During Development.
3. Connect to your host
Add your public URL + /mcp as a connector in your MCP host. For example, in ChatGPT:
- Go to Settings → Connectors → Add Connector
- Enter your public URL:
https://mcp.your-route-1234.pomerium.app/mcp - Save the connector
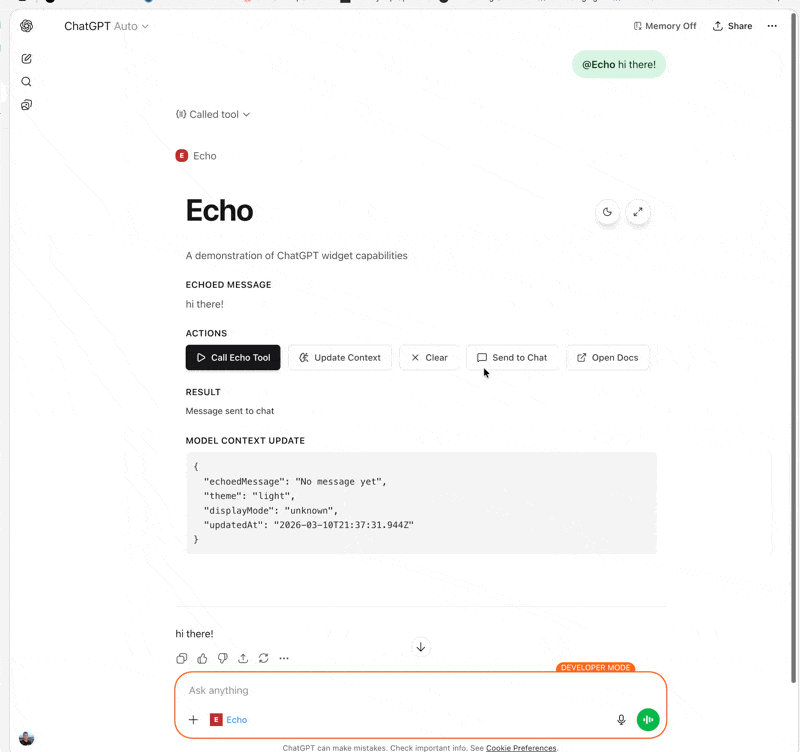
- Start a new chat, add your app, and test with:
echo Hi there!
Other hosts (Claude, VS Code, Goose) follow the same pattern — add a connector pointing to your /mcp endpoint.
4. Build your own tools and widgets
The template's echo tool shows the full pattern. The key pieces when adding your own tool:
Register a tool with UI binding — use registerAppTool to declare the tool and its widget in one place:
registerAppTool(
  server,
  'my_tool',
  {
    title: 'My Tool',
    description: 'Does something cool',
    inputSchema: {
      type: 'object',
      properties: {
        input: {type: 'string', description: 'Tool input'},
      },
      required: ['input'],
    },
    _meta: {
      ui: {resourceUri: 'ui://my-widget'},
    },
  },
  async (args) => {
    const input = MyToolInputSchema.parse(args).input;
    return {
      content: [{type: 'text', text: 'Result'}],
      structuredContent: {result: input},
    };
  },
);
Register a widget resource — the text/html;profile=mcp-app MIME type is required for MCP hosts to render the widget:
registerAppResource(
  server,
  'ui://my-widget',
  'ui://my-widget',
  {mimeType: RESOURCE_MIME_TYPE},
  async () => ({
    contents: [
      {
        uri: 'ui://my-widget',
        mimeType: RESOURCE_MIME_TYPE, // 'text/html;profile=mcp-app'
        text: await readWidgetHtml('my-widget'),
      },
    ],
  }),
);
Widget entry point — React component in widgets/src/widgets/my-widget.tsx using the App class from @modelcontextprotocol/ext-apps:
import {App} from '@modelcontextprotocol/ext-apps';
import {StrictMode, useEffect, useState} from 'react';
import {createRoot} from 'react-dom/client';

function MyWidget() {
  const [toolOutput, setToolOutput] = useState(null);
  const [theme, setTheme] = useState('light');

  useEffect(() => {
    const app = new App({name: 'MyWidget', version: '1.0.0'});
    app.ontoolresult = (result) =>
      setToolOutput(result.structuredContent ?? null);
    app.onhostcontextchanged = (context) => setTheme(context?.theme ?? 'light');
    app.connect();
  }, []);

  return (
    <div className={theme === 'dark' ? 'dark' : ''}>
      <h1>My Widget</h1>
      <pre>{JSON.stringify(toolOutput, null, 2)}</pre>
    </div>
  );
}

const rootElement = document.getElementById('my-widget-root');
if (rootElement) {
  createRoot(rootElement).render(
    <StrictMode>
      <MyWidget />
    </StrictMode>,
  );
}
The build auto-discovers all files matching widgets/src/widgets/*.{tsx,jsx} and bundles them with their mounting code.
See the template README for the complete guide: project structure, App API reference, display modes, inline widget assets, Storybook, testing, environment variables, and troubleshooting.
Inline widget assets
Some hosts (e.g., Claude) require fully self-contained HTML — external <script> and <link> tags won't load inside their sandboxed iframes. Use inline mode for these hosts or when sharing your work remotely via pom.run:
npm run dev:inline
This inlines JS/CSS as <script>/<style> blocks and converts local images to data URIs. The widget build runs in watch mode so file changes are automatically rebuilt.
Inline mode is not needed in production — once deployed to a public URL, hosts fetch widget assets directly via normal URLs.
For production deployment
You need two Pomerium routes — one for the MCP server (auth-gated) and one for the widgets (public):
runtime_flags:
  mcp: true

routes:
  # MCP server — fine-grained authorization required for tool calls
  - from: https://my-mcp-app.your-domain.com
    to: http://my-mcp-app:8080/mcp
    name: My MCP App (server)
    mcp:
      server: {}
    policy:
      allow:
        and:
          - domain:
              is: company.com

  # Widget assets — must be public so the MCP host can render iframes without credentials
  - from: https://my-mcp-app-ui.your-domain.com
    to: http://my-mcp-app-widgets:4444
    name: My MCP App (widgets)
    allow_public_unauthenticated_access: true
The MCP server URL you register in your host points to the first (auth-gated) route. Widget resources served by your MCP server reference the second (public) route. Never put the widget route behind an auth policy — MCP hosts cannot forward credentials when loading iframe content.
See Protect an MCP Server for the full setup guide.
Sample repos and next steps
- pomerium/chatgpt-app-typescript-template — Starter template for MCP Apps with the official ext-apps SDK — full README with project structure, API reference, testing, Docker, and troubleshooting
- MCP Apps extension spec — Official standard for interactive UI in MCP hosts
- ext-apps SDK API reference — TypeScript API docs for
@modelcontextprotocol/ext-apps - Tunnel to ChatGPT During Development — pom.run tunneling setup details
- Protect an MCP Server — Deploy permanently behind Pomerium
- MCP Full Reference — Token types, session lifecycle, configuration details