Tunnel to ChatGPT During Development
Use pom.run to create an SSH tunnel from your local machine to a Pomerium-hosted proxy, giving ChatGPT (or any external MCP client) a secure, authenticated URL to reach your local MCP server.
What you get:
- One command (
ssh -R 0 pom.run) to expose a local MCP server over HTTPS - Pomerium authenticates and authorizes every request
- Works with ChatGPT Apps, Claude, and any MCP client that supports OAuth
Architecture
Prerequisites
- A local MCP server that implements the HTTP Streamable protocol on port 8080
- An MCP client (e.g., a ChatGPT Plus subscription)
- SSH client (already installed on macOS/Linux)
A note on OAuth
Pomerium uses OAuth to authenticate requests. An MCP client will use OAuth to assume the identity of the user (i.e. you). It is easiest to use one common account (e.g. your Google account) when signing in to ChatGPT and Pomerium.
Step-by-step
1. Start a local MCP server
Clone the example ChatGPT app template and start it:
git clone https://github.com/pomerium/chatgpt-app-typescript-template my-mcp-app
cd my-mcp-app
npm install
npm run dev
This starts an MCP server on http://localhost:8080 and an assets server on http://localhost:4444.
2. Open the SSH tunnel
ssh -R 0 pom.run
This creates an SSH reverse port forwarding tunnel from pom.run to your computer. Traffic sent to the Pomerium-hosted proxy is forwarded to port 8080 on your machine.
You will see a sign-in prompt:
Please sign in with hosted to continue
http://data-plane-us-centrial1-1.dataplane.pomerium.com/.pomerium/sign_in?user_code=xxxxxxxx
Click the link and sign in (or sign up if this is your first time).
3. Use the Pomerium Terminal UI (TUI)
After signing in, the Pomerium TUI appears in your terminal with a route URL like https://mcp.your-route-1234.pomerium.app/.
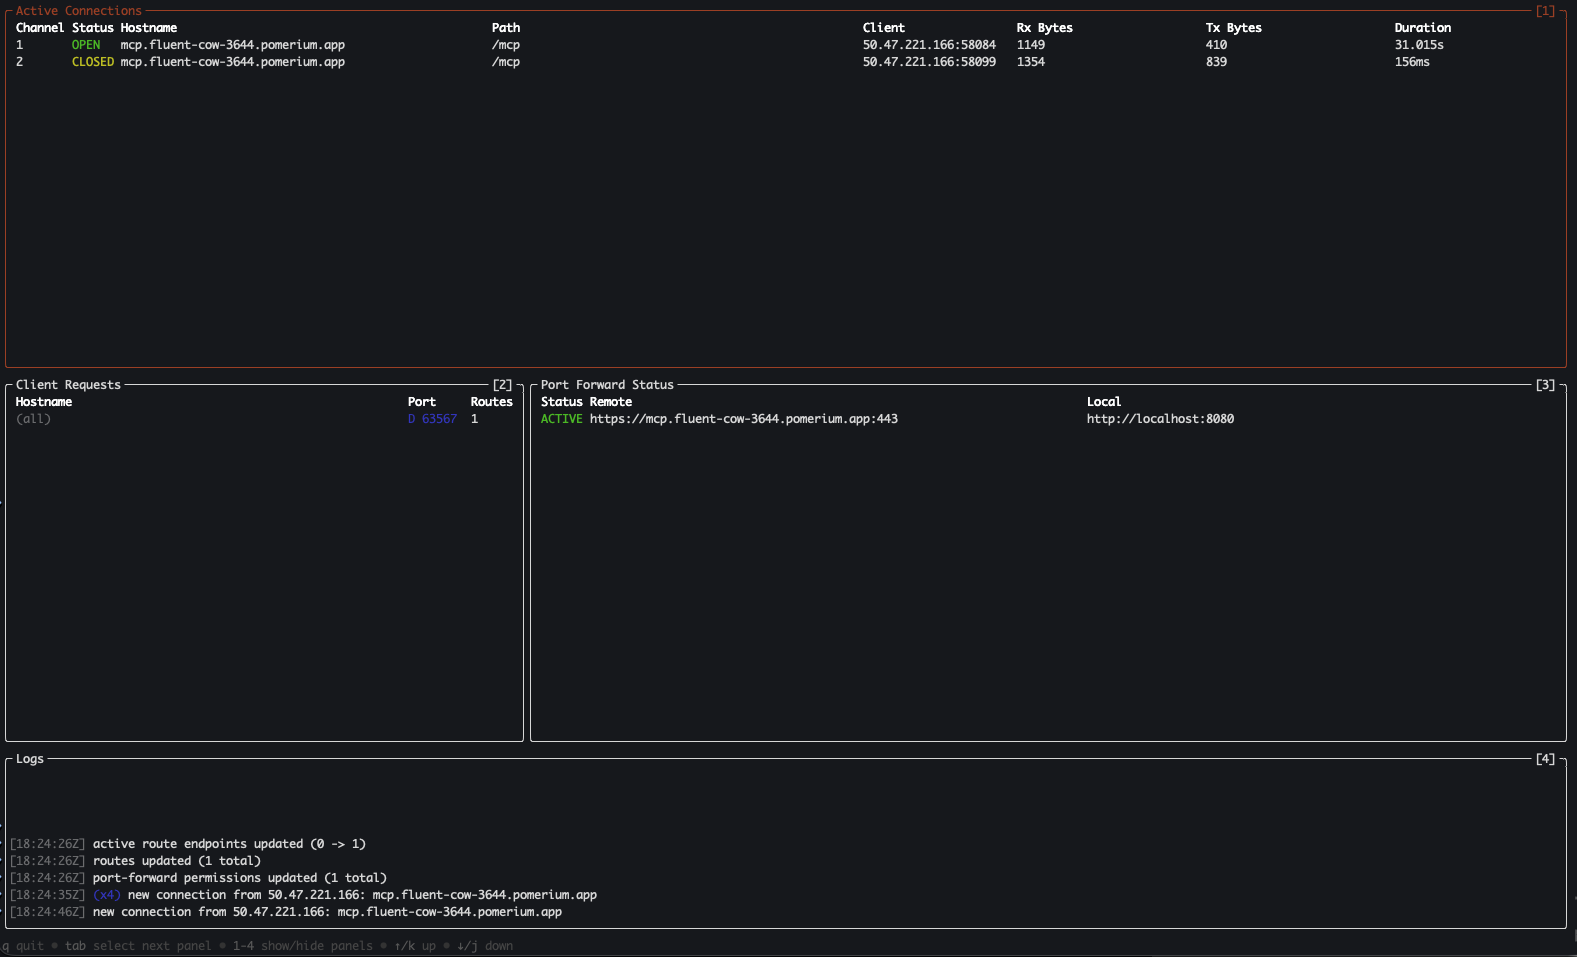
The TUI panes show:
- Active Connections — unique connections from remote machines to your local server
- Client Requests — unique port forwarding requests
- Port Forward Status — status of tunnels into your local machine
- Logs — events from the Pomerium proxy server
4. Create a ChatGPT App
Sign in to your ChatGPT Plus account. Go to Settings → Apps → Advanced settings, enable Developer mode, then click Create app.
Fill in:
- Name: Echo Server (or your app name)
- MCP Server URL:
https://mcp.your-route-1234.pomerium.app/mcp - Authentication: OAuth
- I understand and want to continue: check
5. Test it
Ask ChatGPT to call your app. For example: "@Echo Hi there!"
How it all works
You have a local MCP server implementing a ChatGPT Apps widget. The SSH reverse port forwarding tunnel creates a secure, encrypted connection from Pomerium's hosted proxy to your computer. That provides a URL, and Pomerium authenticates and authorizes every request it proxies to your computer.
ChatGPT uses OAuth to authenticate itself as you. When ChatGPT makes MCP tool calls, they go to the Pomerium hosted proxy, which checks authentication and authorization, then proxies the request through the SSH tunnel to your local MCP server.

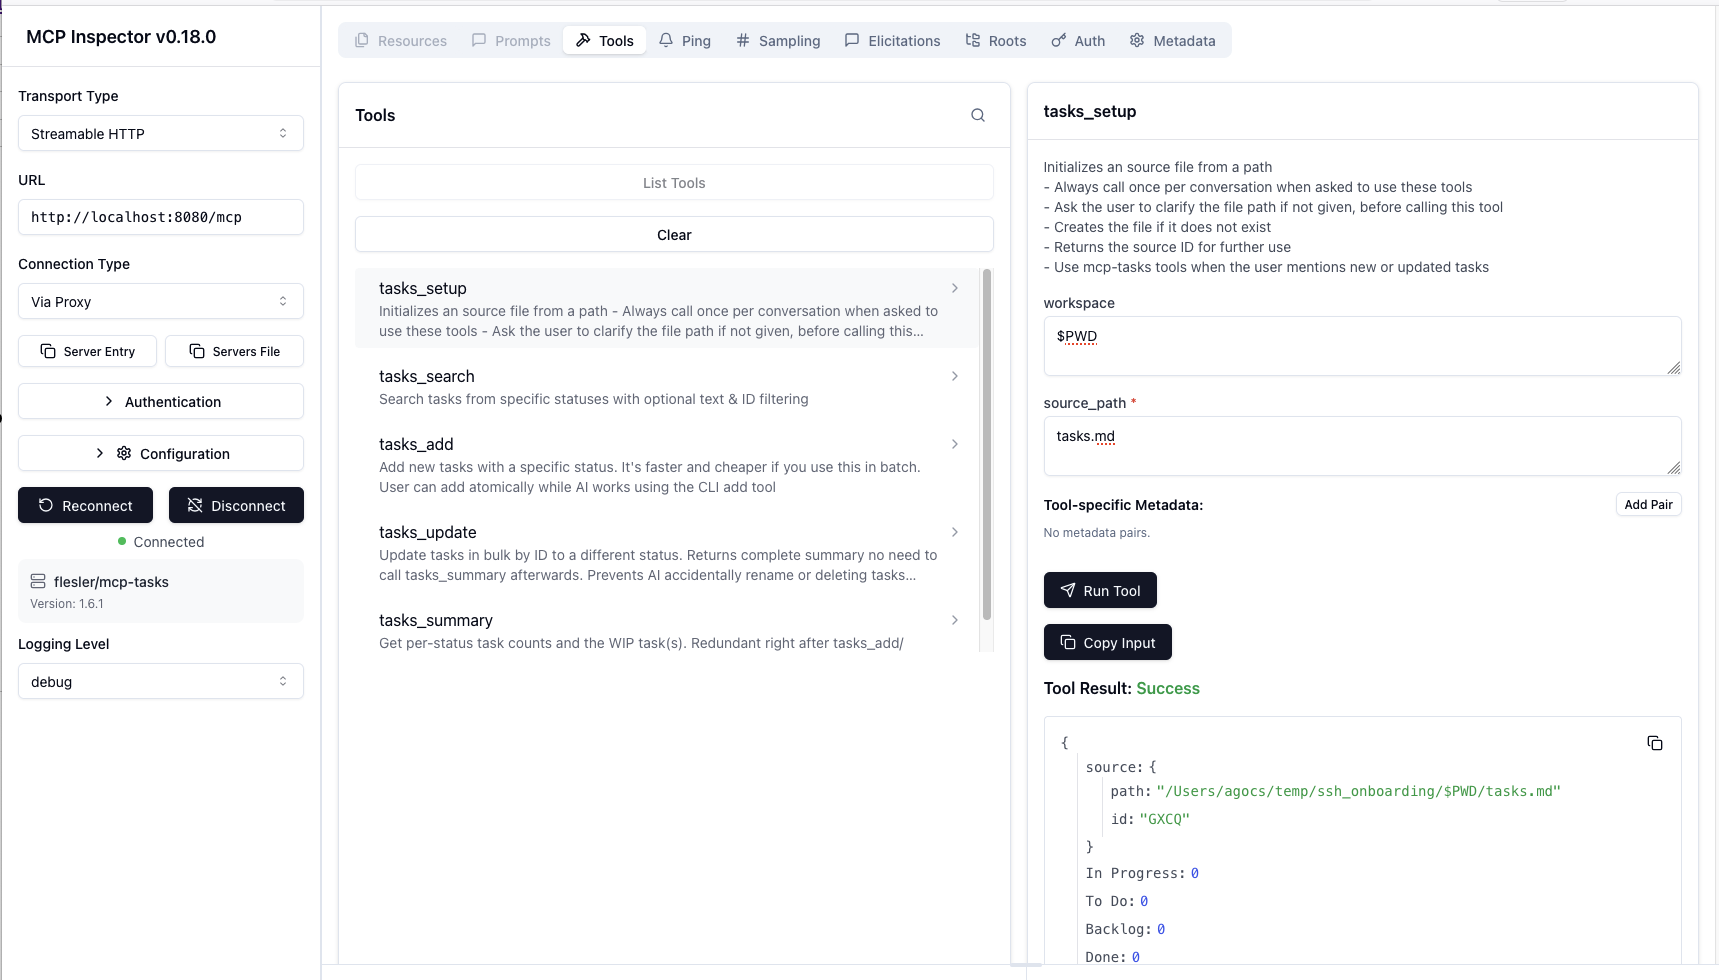
Troubleshooting
Use the MCP Inspector to verify your MCP server is running correctly:
npx -y @modelcontextprotocol/inspector@latest
Connecting to the local port
- Transport type: Streamable HTTP
- URL:
http://localhost:8080/mcp - Connection Type: Via Proxy
- Click Connect
You should be able to click Tools → List Tools and see the tools exposed by your MCP server.
Connecting via the Pomerium proxy
Click Disconnect, then click OAuth Settings → Quick OAuth Flow. You should see "Authentication completed successfully".
Change the URL to your hosted route URL and click Connect. You should be able to call tools on your MCP server as before.
Sample repos and next steps
- pomerium/chatgpt-app-typescript-template — Starter template for ChatGPT apps with MCP
- Protect an MCP Server — Deploy a permanent MCP server behind Pomerium
- MCP Full Reference — Token types, session lifecycle, configuration details